


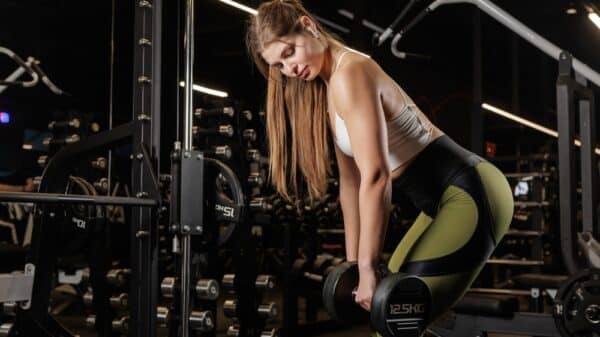


Many fitness enthusiasts believe they have mastered the hip hinge until they face a lower back injury or hitting a plateau. Attempting heavy movements like the Sumo deadlift with a rounded spine is a common mistake that often stems from a fundamental misunderstanding of how the hips should move. There is a critical distinction between simply bending over and performing a true hip hinge.
The hip hinge serves as the foundational movement pattern for powerhouse exercises like deadlift variations, kettlebell swings, cleans, and broad jumps. Beyond the gym, it is the same mechanic used for daily tasks such as lifting heavy groceries or picking up luggage. When performed incorrectly, the load shifts from the powerful glutes and hamstrings to the more vulnerable lower back and knees, increasing the risk of injury. With insights from strength coach Gareth Sapstead, we can explore how to rebuild this essential pattern using specific corrective drills.
Assessing Your Hip Hinge Mechanics at Home
You do not need specialized equipment to evaluate your current movement quality. A simple wall-based test can reveal whether your hips are functioning as they should or if you are overcompensating with your spine.
The Wall-Assisted Hinge Evaluation
- Position yourself with your back toward a wall, placing your heels approximately six inches away from the baseboard.
- Keep your feet hip-width apart and maintain a “soft” bend in the knees (avoid locking them out).
- Initiate the movement by reaching your glutes backward toward the wall rather than dropping your torso toward the floor.
- Extend your arms forward to provide a counterbalance and help maintain stability.
- Maintain a neutral spine and keep your chest upright. If you can touch the wall while keeping your form intact, step two inches further away and try again to find your maximum range.
Identifying Faults in Your Hinge Pattern
During the wall test, pay attention to these specific indicators of movement dysfunction. You may need to refine your technique if you cannot:
- Reach the wall without your lower back beginning to arch or round.
- Maintain vertical shins throughout the entire range of motion.
- Feel a clear “stretch” or tension build-up in the hamstrings and glutes.
- Keep your weight distributed so that you don’t feel like you are falling backward.
A successful hinge requires a balance of mobility and stability. If these markers are missing, it suggests a breakdown in your posterior chain coordination.
Anatomy of a Functional Hip Hinge
To execute a powerful hinge, several muscle groups must work in harmony. It requires significant hip flexion—allowing the glutes to travel backward—without the lumbar spine taking over the load. The hamstrings must have the length and tension tolerance to support the weight, while the adductors provide necessary pelvic stability. Additionally, the latissimus dorsi and upper back muscles must engage to keep the spine in a safe, neutral position. In essence, a strong hinge relies on:
- Deep hip flexion isolated from the lumbar spine.
- Optimal hamstring length and the ability to load the posterior chain.
- Functional adductor mobility.
- Active lat engagement to stabilize the torso.
Essential Drills to Refine Your Hinge Technique
The following exercises are designed to correct common technical errors and can also serve as an effective warm-up sequence before a heavy lifting session.
The Resistance Band Lat-Engaged RDL
The Band Sweeping Romanian Deadlift (RDL) uses forward-pulling tension to force the lats to work. As coach Sapstead notes, many lifters lose their form once they hold a barbell; the weight drifts away from the shins, the upper back softens, and the connection between the upper and lower body is lost. This drill solves that by teaching you how to “sweep” the weight toward your body.
Why It Enhances Your Hinge:
Maintaining full-body tension is often more difficult than the movement itself. Sapstead explains that the lats do more than just move the shoulders—they contribute significantly to trunk stiffness. When the lats are fully engaged, it creates a rigid bridge that allows force to transfer safely and efficiently between your legs and your upper body, making the entire movement feel more stable.
Execution Steps:
- Secure a resistance band to a low anchor point at ankle height.
- Hold the band with both hands and step back until there is noticeable tension pulling your arms forward.
- Stand tall, soften the knees, and drive your hips back while using your lats to keep your hands close to your legs.
- Visualize pulling your upper arms into your ribs, as if you are trying to put the band into your back pockets.
- Once you feel the peak tension in your hamstrings, drive your hips forward to return to the start.
Recommended Volume: Perform 2 to 3 sets of 8 to 12 controlled repetitions as part of your preparation for deadlifts or swings.
Quadruped Hamstring Rock-Backs
This drill is performed on the floor and focuses on isolating hamstring tension. It is particularly effective for those who struggle to distinguish between hip movement and lower back movement.
Why It Enhances Your Hinge:
While many people blame “tight” hamstrings for poor form, the real issue is often a lack of coordination. This drill teaches your body how to accept tension in the hamstrings while keeping the spine completely neutral, effectively “greasing the groove” for the standing hinge.
Execution Steps:
- Begin on your hands and knees, then bring one foot forward between your hands so your chest is resting near your thigh.
- Slowly push your hips backward toward your rear heel until you feel a deep stretch in the front leg’s hamstring.
- Shift your weight forward to the starting position and repeat for the full set before switching legs.
Recommended Volume: Complete 2 sets of 5 to 8 repetitions per side during your lower body warm-up.
Adductor-Focused Quadruped Rock-Backs
This variation targets the inner thighs, which play a major role in stabilizing the pelvis during heavy lifts. By extending one leg to the side, you can address mobility restrictions that often cause the lower back to compensate.
Why It Enhances Your Hinge:
The adductors are essential for hip extension. If these muscles are restricted, your hinge may feel “blocked” or stiff. This drill helps the hips move independently of the spine, ensuring that your pelvis stays level and stable during more complex movements.
Execution Steps:
- From a hands-and-knees position, extend one leg straight out to the side with your foot flat on the floor.
- You can stay on your hands or drop to your forearms for a deeper stretch.
- Gently rock your hips back toward your heel while keeping your spine straight and your extended foot planted.
- Feel the lengthening in the inner thigh, then rock forward to reset.
Recommended Volume: Pair these with the hamstring rock-backs for 2 sets of 6 to 8 repetitions on each side.
Wall-Supported Single-Leg RDL
The single-leg wall-supported RDL is a powerful tool for correcting imbalances. By using a wall for balance, you remove the “stumbling” factor, allowing you to focus entirely on loading the hip and maintaining a flat back.
Why It Enhances Your Hinge:
Many lifters struggle with single-leg movements because balance becomes the limiting factor rather than strength. Using the wall as a stabilizer allows you to prioritize proper hip mechanics and ensures you are actually loading the posterior chain rather than just trying to stay upright.
Summary for Hinge Mastery
Mastering the hip hinge is about more than just flexibility; it is about developing the coordination to move your hips through a full range of motion while maintaining a stable, rigid torso. By using the wall test to identify your current limits and incorporating drills like the Band Sweeping RDL and Hamstring Rock-Backs into your routine, you can build a more resilient posterior chain. Consistent focus on these mechanics will not only improve your performance in the gym but also protect your spine during the physical demands of daily life.
Developing Unilateral Stability with the Wall-Supported Hinge
This variation is designed to help you master the hinge pattern while identifying and correcting side-to-side muscular imbalances. By utilizing the wall for support, you can focus on hip stability and ensuring that the glutes and hamstrings are firing correctly. This reinforcement is essential for maintaining pelvic control during more complex movements.
Execution Guide
- Position yourself facing away from a wall. Shift your weight onto one leg and place the toes of your non-working foot against the wall for balance.
- Keep a slight, “soft” bend in the knee of your standing leg. Ensure your chest remains elevated and your shoulder blades are pulled back and down.
- Shift your weight backward, pushing your hips toward the wall until you feel significant tension in the hamstring and glute of the standing leg. Your upper body should descend until it is nearly parallel with the floor.
- To return to the start, drive your foot firmly into the ground and engage your glutes to pull your torso upright.
- Complete the full set on one side before transitioning to the other leg.
Training Recommendations: This serves as an excellent accessory movement. Aim for 2 to 3 sets of 8 to 10 repetitions per side. Beginners should start with bodyweight to master the mechanics before introducing external resistance.
Correcting Spine Alignment with the Wall and Dowel Drill
The dowel-assisted wall hinge is an effective tool for learning to isolate hip flexion from spinal movement. By maintaining three specific points of contact—the back of the head, the thoracic spine (upper back), and the sacrum (tailbone)—the dowel provides immediate tactile feedback. This setup acts as a “physical coach,” alerting you the moment your back rounds or your posture breaks.
The Importance of Movement Dissociation
Many individuals struggle with the hinge because they inadvertently substitute lower back rounding or a squatting motion for true hip flexion. This drill teaches the body to load the posterior chain—the hamstrings and glutes—while keeping the spine in a safe, neutral position. It transitions the movement from a “back-dominant” pattern to a “hip-dominant” one.
Execution Guide
- Align a dowel along your spine, ensuring it touches your head, upper back, and tailbone throughout the entire movement.
- Stand with your back to a wall, placing your heels approximately 6 to 10 inches away from the baseboard. Keep your knees slightly unlocked.
- Hinge at the hips, reaching back toward the wall while strictly maintaining all three points of contact with the dowel.
- Lightly tap the wall with your glutes.
- Drive your hips forward to return to a standing position, focusing on glute engagement.
- As your mobility and control improve, gradually increase your distance from the wall to deepen the hinge.
Training Recommendations: Use this as a foundational warm-up before performing deadlifts or other heavy hinges. Complete 2 sets of 8 to 10 controlled repetitions.
Does an Optimized Hip Hinge Translate to Better Athletic Results?
Mastering the hip hinge is not simply about increasing flexibility; it is about building a functional unit where the hips, hamstrings, lats, and core work in harmony. By refining this movement through targeted drills, you improve your ability to maintain a neutral spine under tension and transfer force more efficiently through the posterior chain. Whether you are jumping, sprinting, or lifting heavy loads, the ability to own the hinge pattern is a fundamental requirement for peak athletic performance and long-term injury prevention.
Summary
Improving your hip hinge requires a combination of stability, proprioception, and correct sequencing. By incorporating unilateral wall hinges to fix imbalances and dowel drills to ensure spinal integrity, you build a resilient foundation for all lower-body movements. These drills transition you from merely performing a movement to “owning” the pattern, which is the key to unlocking true power and athletic potential.